I make pot roast about once a month from October through March, always in the same 6-quart Dutch oven, always with chuck. It is the cut that turns tender instead of stringy, and the pot does everything: sear, braise, gravy. The only real skill involved is patience, because a pot roast pulled 40 minutes early is tough and there is no fixing it.
Prep time: 25 minutes. Cook time: 3 hours 30 minutes. Total time: about 4 hours. Serves: 6.
What you will need
- 1 boneless chuck roast, 3 1/2 to 4 pounds
- 2 teaspoons kosher salt, plus more to finish
- 1 teaspoon freshly ground black pepper
- 2 tablespoons vegetable oil or other neutral oil
- 1 large yellow onion, cut into thick wedges
- 4 cloves garlic, smashed
- 2 tablespoons tomato paste
- 1 cup dry red wine (or 1 cup extra beef broth plus 1 tablespoon red wine vinegar)
- 3 cups beef broth, low sodium
- 2 tablespoons Worcestershire sauce
- 3 sprigs fresh thyme and 2 bay leaves
- 1 1/2 pounds carrots, peeled and cut into 2-inch chunks
- 2 pounds baby Yukon Gold potatoes, halved if large
- 3 tablespoons all-purpose flour mixed with 3 tablespoons cold water, for the gravy
- Chopped parsley, optional
A whole chuck roast is better than two small ones. More surface area means faster drying out. If your store only sells 2-pound pieces, buy two, sear them separately, and check for doneness 30 minutes earlier.
Dry the meat, then sear it properly
Pat the roast dry with paper towels, then salt and pepper it on all sides. If you have time, salt it in the morning and leave it uncovered in the fridge. The surface dries out and browns better.
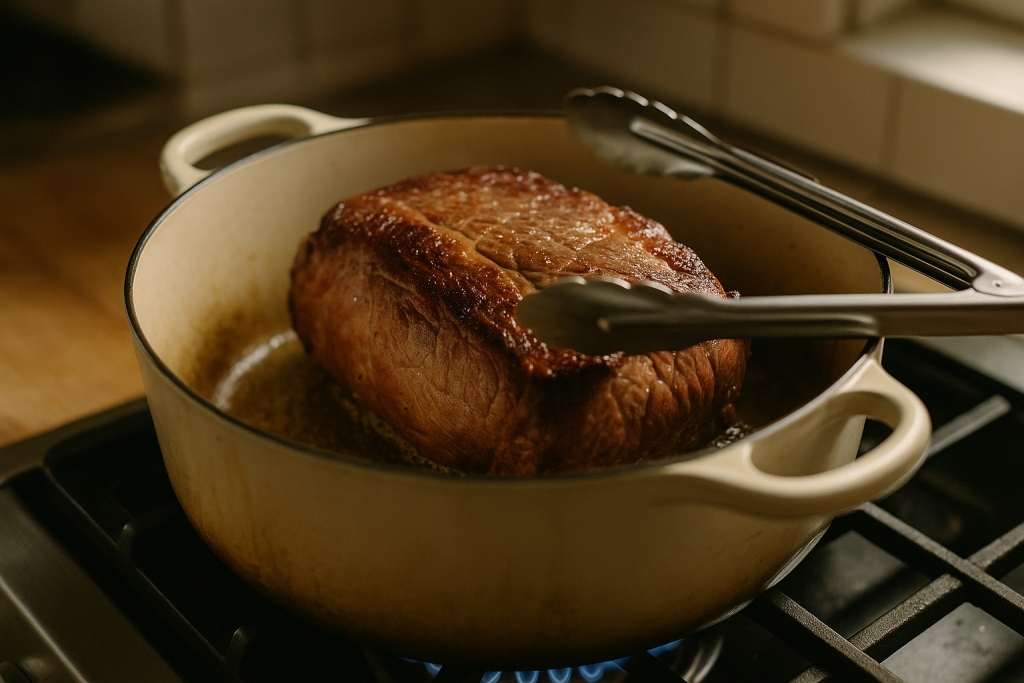
Heat the oil in the Dutch oven over medium-high until it shimmers and just starts to smoke at the edges. Lay the roast in and do not touch it for 4 to 5 minutes. When it releases from the pot on its own, it is browned. Turn and repeat on every side, including the narrow ends. This takes 12 to 15 minutes total and it is the single step people cut short. That dark crust is most of the flavor in the finished gravy.
Move the roast to a plate. Pour off all but about a tablespoon of fat.
Build the braising liquid
Heat your oven to 325°F (165°C) while you work.
Add the onion wedges to the pot and cook 4 minutes, scraping the browned bits loose as they soften. Stir in the garlic and tomato paste and cook another minute, until the paste darkens from red to brick. Pour in the wine and let it bubble hard for 2 to 3 minutes, scraping the bottom until the pot is clean. Add the broth, Worcestershire, thyme and bay leaves.
Return the roast and any juices from the plate. The liquid should come about two thirds up the side of the meat, not cover it. If yours is swimming, ladle some out. A pot roast that is fully submerged boils instead of braises, and the top never picks up that roasted flavor.
Lid on, into the oven.
Timing and when to add the vegetables
Braise for 2 hours untouched. Then add the carrots and potatoes, tucking them around and under the meat so they sit in the liquid. Put the lid back on and give it another 1 to 1 1/2 hours.
Potatoes added at the start turn to mush. Carrots added at the start dissolve into the sauce, which some people like, but then you have no carrots on the plate.
The roast is done when a fork twisted into the thickest part meets no resistance and the meat pulls apart in strands. On a thermometer that lands somewhere around 200 to 205°F internal, well past the 145°F that makes a steak safe. Chuck is full of collagen, and collagen only melts into gelatin in that high range, held there for a while. Beef pulled at 175°F is safe to eat and unpleasant to chew.
If it is not tender, it is not overcooked. Cover it and give it another 30 minutes. I have never once had a chuck roast fail to come around with more time.
Making the gravy in the same pot
Lift the roast onto a cutting board and the vegetables into a bowl with a slotted spoon. Tent both loosely with foil. Fish out the thyme stems and bay leaves.
Let the liquid settle two minutes, then spoon off the fat that rises. Set the pot over medium heat and bring it to a simmer. Whisk the flour and cold water together until smooth, then whisk that slurry into the simmering liquid in a thin stream. Cook 3 to 4 minutes, whisking, until it coats the back of a spoon. Taste and salt it now, at the end, since the liquid has reduced and concentrated the whole time.
For thinner jus instead of gravy, skip the slurry and just simmer the defatted liquid hard for 8 to 10 minutes.
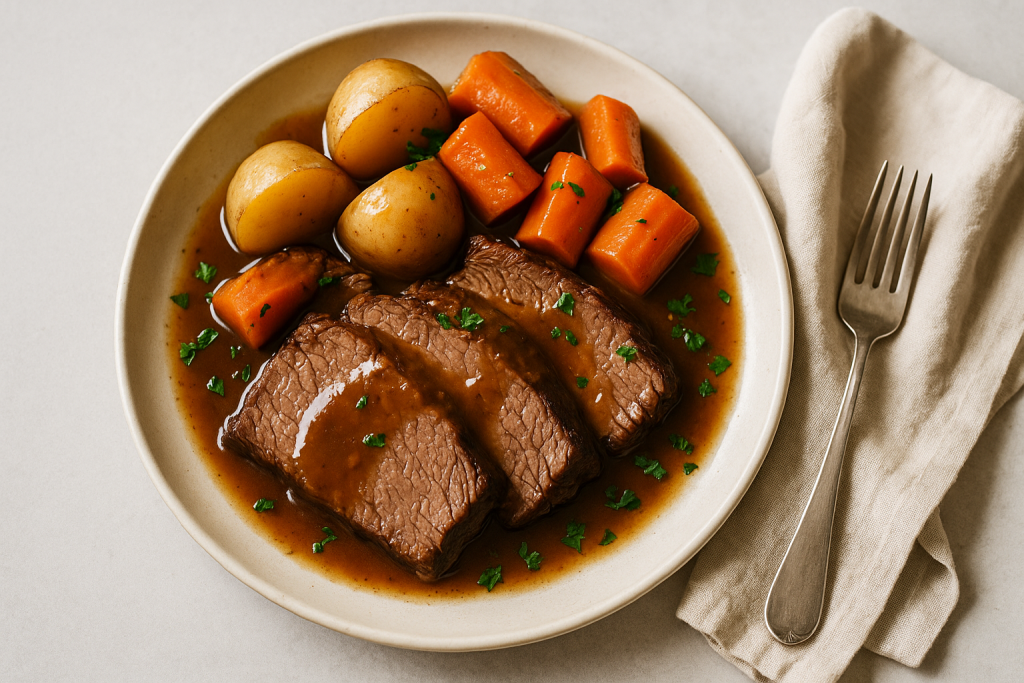
Slice the roast across the grain into thick slabs, or pull it into chunks with two forks. Sliced looks better, pulled soaks up more gravy. Spoon the gravy over everything and scatter parsley if you have it.
Substitutions that actually work
Chuck is my first choice and brisket flat is my second, though brisket needs closer to 4 hours and should be sliced thin across the grain. Bottom round and eye of round stay dry no matter how long you cook them. Skip them for this.
No wine in the house: use an extra cup of broth plus a tablespoon of red wine vinegar or balsamic. The acid matters more than the alcohol.
Russets instead of Yukon Golds fall apart faster, so add them in the last 45 minutes. Sweet potatoes need only 40 minutes. Parsnips behave like carrots. Mushrooms, half a pound, quartered, can go in with the onions.
No Dutch oven: any heavy pot with a tight lid works, or sear on the stove in a skillet and move everything to a covered roasting pan. A thin pot scorches at the bottom, so check it at the two-hour mark.
Slow cooker and stovetop versions
You can do the whole braise in a slow cooker, but sear the roast in a skillet first and deglaze that skillet with the wine so nothing is left behind. Then 8 hours on low, with the vegetables added at the start since slow cookers are gentler. The result is looser and less concentrated than the oven version, and you will want to reduce the liquid in a saucepan before thickening it.
On the stovetop, keep the heat at the lowest setting that gives you a lazy bubble every few seconds and turn the roast once an hour. The bottom of the meat sits directly over the burner and can stick.
Storing and reheating
Pot roast is better the next day. Cool it no longer than two hours at room temperature, then refrigerate the meat submerged in its gravy in a covered container. It keeps 3 to 4 days.
Reheat gently, covered, in a 300°F (150°C) oven for 25 to 30 minutes, or in a covered saucepan over low heat with a splash of broth. A microwave on high turns the strands rubbery.
For the freezer, pack meat and gravy together in a freezer bag or container with the air pressed out, and use within 3 months. The potatoes do not freeze well, they go grainy, so I eat those the first two days. Thaw overnight in the fridge before reheating.
Leftover shreds with the gravy over egg noodles, or piled on a toasted roll with sharp provolone, is the meal I look forward to more than the original.