Table of Contents
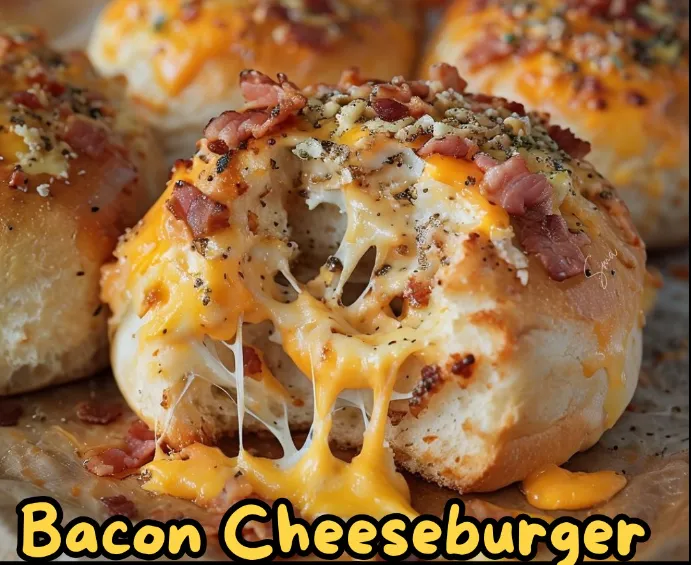
Bacon Cheeseburger Garlic Bombs
🍔 Ingredients:
1 lb ground beef 🍖
12 slices of bacon 🥓
1/2 cup cheddar cheese, shredded 🧀
1/4 cup garlic butter 🧄🧈
12 small dough balls (store-bought or homemade) 🍞
Salt and pepper to taste 🧂
🍳 Instructions:
Cook ground beef with salt and pepper until browned, then stir in shredded cheddar cheese.
Flatten each dough ball and place a spoonful of beef mixture in the center. Fold dough over to seal.
Wrap each bomb with a slice of bacon, brushing with garlic butter.
Bake at 375°F (190°C) for 15-20 minutes until golden brown and bacon is crispy.
Serve hot and enjoy the cheesy, garlicky goodness!
⏲ Prep Time: 15 minutes
⏲ Cook Time: 20 minutes
🍽 Servings: 12
🔥 Calories: 300 per serving”
20 tips for perfect Bacon Cheeseburger Garlic Bombs:
- Use Lean Ground Beef: Opt for 80/20 ground beef for a balance of flavor and fat without excess grease.
- Cook Bacon Crispy: Cook the bacon until it’s crispy before wrapping the bombs. This ensures it stays crispy even after baking.
- Preheat the Oven: Always preheat your oven to the correct temperature to ensure even baking.
- Season Meat Well: Season the ground beef generously with salt and pepper for better flavor.
- Shred Cheese Yourself: Shred cheddar cheese from a block for better melting and flavor compared to pre-shredded cheese.
- Use Fresh Garlic Butter: Make your own garlic butter with fresh garlic for the best flavor. You can use unsalted butter for more control over the salt.
- Properly Seal Dough: Ensure the dough balls are well-sealed around the beef mixture to prevent leakage during baking.
- Avoid Overfilling: Don’t overfill the dough balls; a small spoonful of beef mixture is enough. Too much filling can cause the dough to burst.
- Brush with Garlic Butter Generously: Brushing the bacon-wrapped dough with garlic butter adds flavor and helps it brown nicely.
- Use a Baking Sheet: Place the bombs on a baking sheet lined with parchment paper to catch any drips and make cleanup easier.
- Space Them Out: Leave space between each bomb on the baking sheet to ensure even baking and crisping.
- Check for Doneness: Bake until the bacon is crispy and the dough is golden brown. The internal temperature of the beef should reach 160°F (71°C).
- Rest Before Serving: Let the bombs cool for a few minutes after baking. This helps the cheese set and makes them easier to eat.
- Serve with Dip: Consider serving with a side of dipping sauce, like ketchup, mustard, or a creamy ranch.
- Experiment with Cheese: Try different types of cheese, like Monterey Jack or pepper jack, for a different flavor profile.
- Add Herbs: Mix fresh herbs, like parsley or chives, into the garlic butter for added flavor.
- Use Homemade Dough: For a more personal touch, use homemade dough rather than store-bought.
- Check Bacon Wrapping: Ensure bacon wraps snugly around each bomb to prevent it from falling off during baking.
- Adjust Bake Time: If using larger or smaller dough balls, adjust the baking time accordingly.
- Try Different Fillings: Experiment with additional fillings like caramelized onions or pickles for a unique twist.
10 questions and answers about Bacon Cheeseburger Garlic Bombs:
- Q: Can I use pre-cooked bacon for this recipe? A: Pre-cooked bacon is convenient, but it won’t be as crispy or flavorful. For best results, cook bacon until crispy before using it in this recipe.
- Q: Can I make the dough balls from scratch? A: Yes, you can use homemade dough if you prefer. Just make sure it’s well-kneaded and allows for easy sealing around the filling.
- Q: What if I don’t have garlic butter? A: You can make your own garlic butter by mixing softened butter with minced garlic and a pinch of salt. You can also use plain melted butter and sprinkle garlic powder over the bombs.
- Q: How can I prevent the dough from bursting during baking? A: Make sure to seal the dough well around the filling and avoid overfilling. Also, ensure the bacon is wrapped tightly around the dough.
- Q: Can I use a different type of cheese? A: Absolutely! Feel free to experiment with cheeses like mozzarella, Monterey Jack, or pepper jack for different flavors.
- Q: Can I make these ahead of time? A: Yes, you can prepare and assemble the bombs in advance. Store them in the refrigerator and bake them just before serving.
- Q: How can I ensure the bacon stays crispy? A: Make sure the bacon is fully cooked before wrapping it around the dough. Baking at a high temperature also helps keep the bacon crispy.
- Q: Can I use frozen dough balls? A: Yes, frozen dough balls can be used. Just make sure they are fully thawed and at room temperature before filling and baking.
- Q: What side dishes pair well with these garlic bombs? A: These garlic bombs go great with simple sides like a fresh salad, crispy fries, or even a creamy coleslaw.
- Q: Can I freeze these bombs for later use? A: Yes, you can freeze the assembled bombs before baking. Just place them on a baking sheet and freeze until solid, then transfer to a freezer bag. Bake from frozen, adding a few extra minutes to the cooking time.

